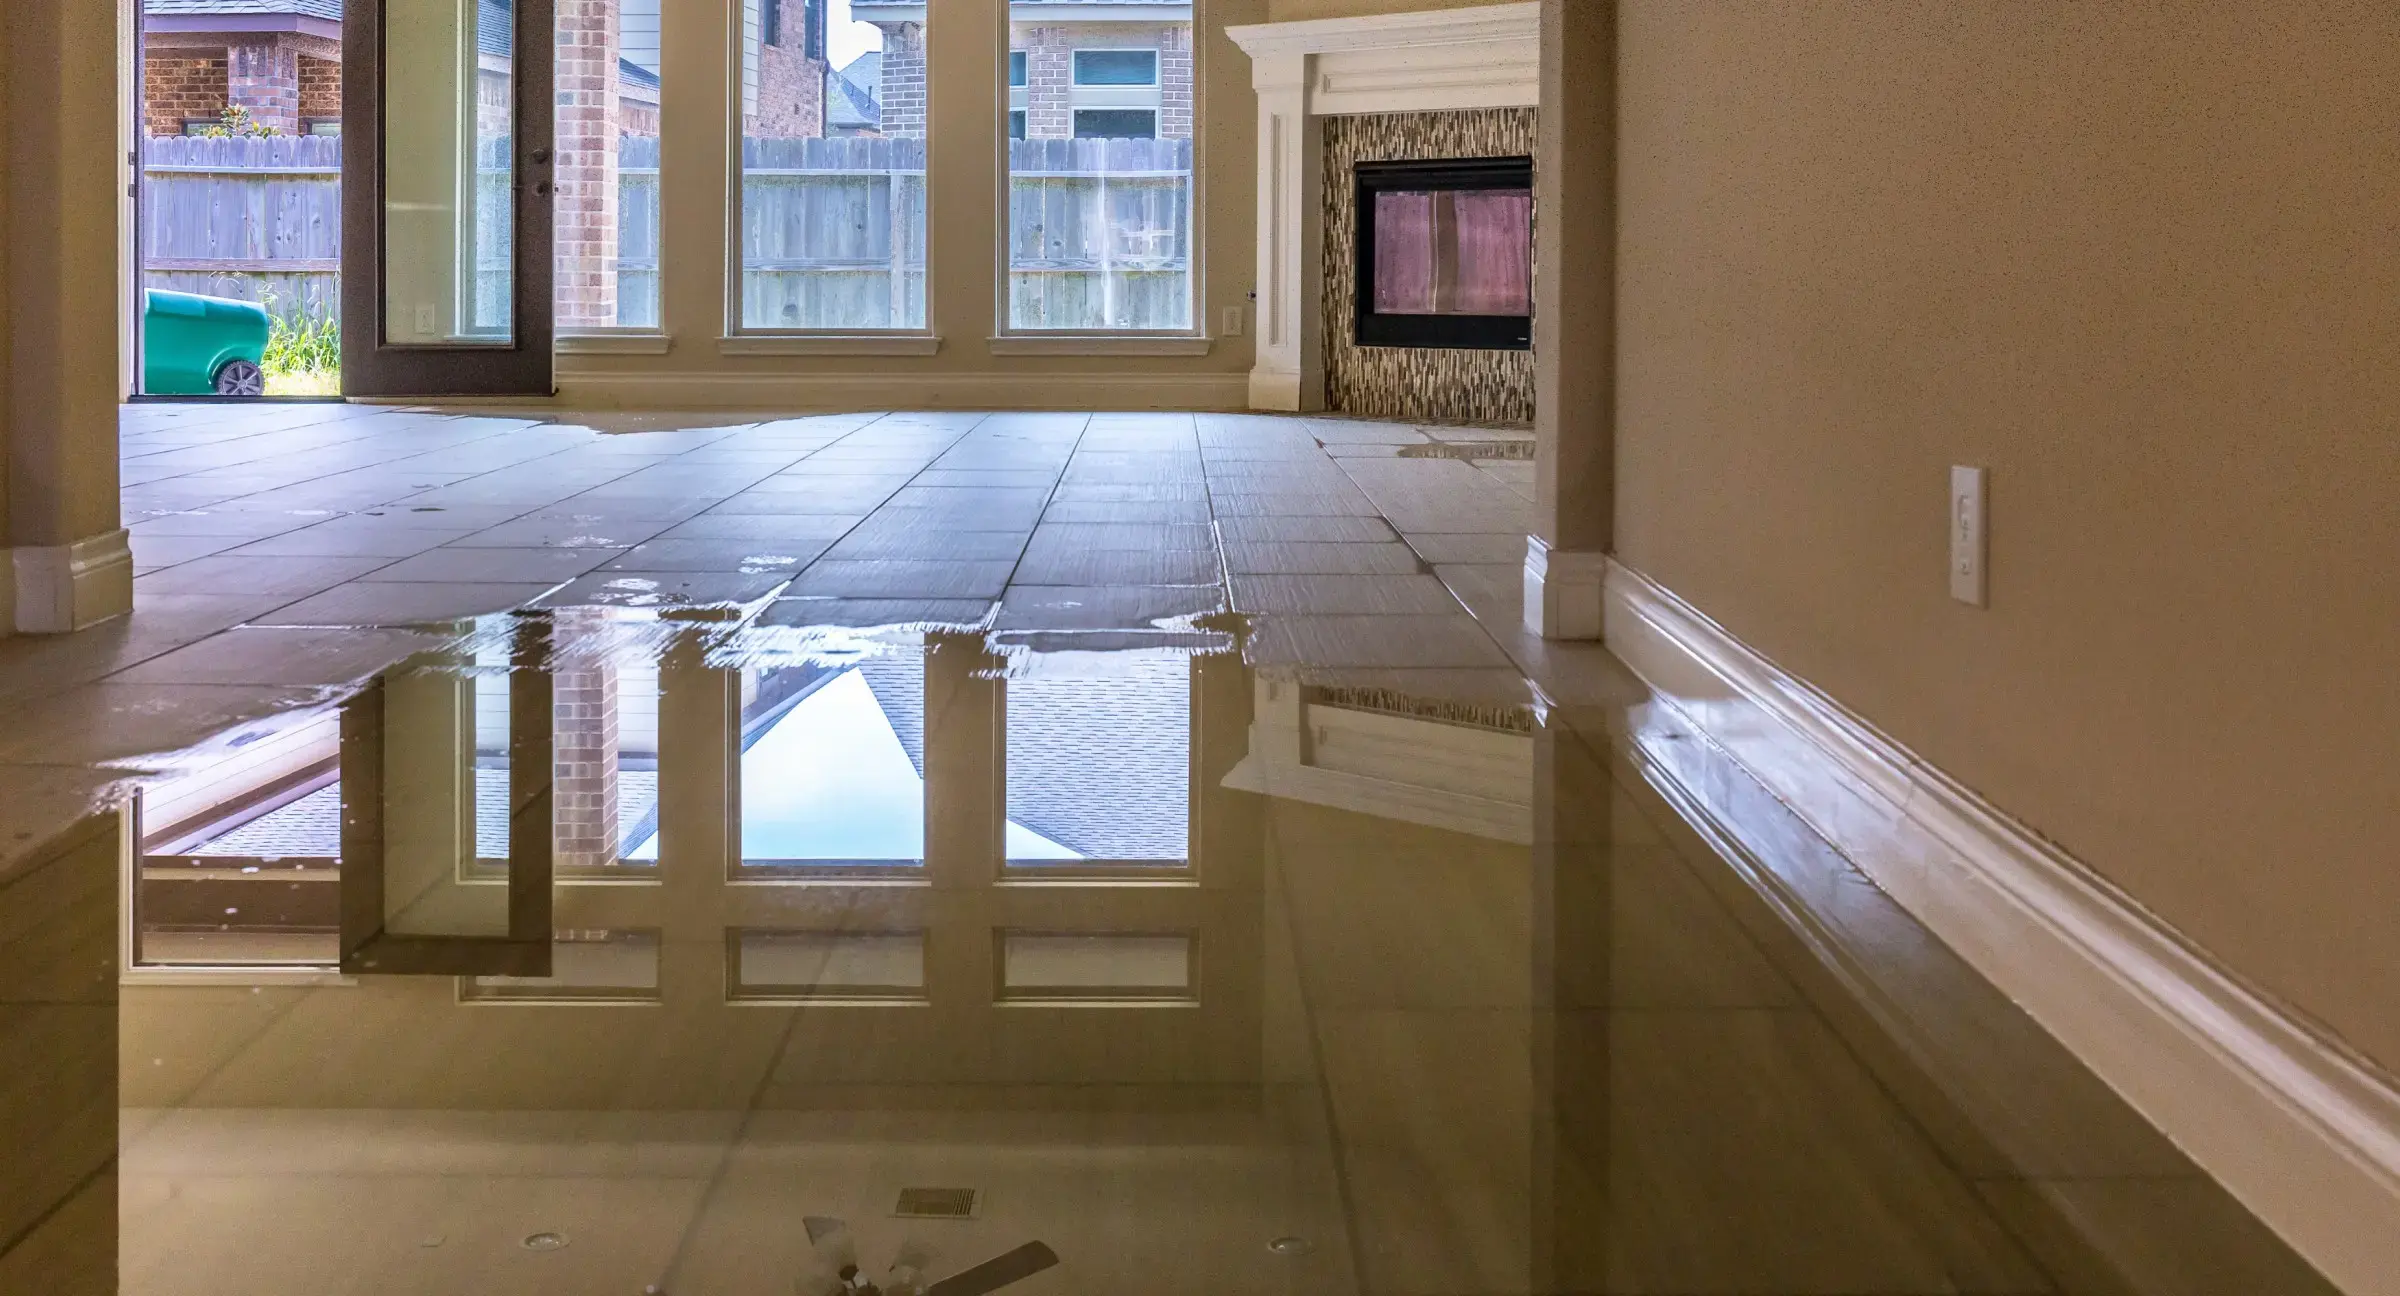
How to Finally Stop Your Leaky Faucet

How to Finally Stop Your Leaky Faucet

Drip, drip, drip. That incessant trickle of water is enough to drive anyone wild. And a leaky faucet is more than just annoying — it’s expensive. The slow drip of water may seem like nothing but it can significantly spike your monthly water bill. If your leaky faucet is costing you money (and your sanity), you can finally put a stop to it with these steps:

Figure Out Which Kind of Faucet You Have

There are four common types of faucets, each with different parts and unique problems. Before you can fix your leaky faucet, you’ll need to find out which kind you have.

Compression Faucet

Compression faucets are one of the oldest types of faucets and you’ll typically see them in old houses or in utility sinks. They’re inexpensive but prone to leaks. These faucets always have two separate knobs, one for hot water and one for cold.  A compression stem controls the water flow, involving a screw and washer mechanism.

Cartridge Faucet

With a cartridge faucet, an internal cartridge controls the flow of water and also mixes the hot and cold water at the same time. It can come with a single lever handle or with two knobs. The double-handle cartridge faucets will look similar to the compression faucets. The easiest way to distinguish them is by testing the fluidity of the handles. A cartridge faucet will turn smoothly and easily; a compression faucet, however, will take some extra effort to turn on and off.

Disk Faucet

The disk faucet features a single lever handle over a cylindrical body. Ceramic disks at the bottom rise and fall to control the flow of water. Disk faucets are a newer concept and due to their high quality, they don’t break often.

Ball Faucet

Mostly common in kitchen sinks, a ball faucet has a single handle that moves over a rounded cap. They are washerless and include a complex system of parts. For this reason, it can be difficult to figure out which part is responsible for a leak. To save yourself time, money and aggravation, it’s best to just replace the whole faucet.


Start Your Prep Work

Before you begin, shut off the water valve under the sink. Plug up the drain to avoid losing parts. You’ll likely need a screwdriver, a wrench, and a pair of pliers. To protect your faucet’s fixtures from scratching, you can cover your wrench and pliers with duct tape. You will also need replacement parts for your particular faucet. To take some of the guesswork out, you can usually find faucet repair kits at your local hardware store.


How To Fix a Compression Faucet

1. Take Off Handles

Pry off the decorative caps with a screwdriver or utility knife. Then unscrew the handles and set them aside.

2. Remove Valve Stem Assembly

If there are covers over the assembly, you can usually remove them with pliers. Once you do that, you should discover a hex nut. Using a wrench and pliers, turn the nut counterclockwise to disassemble the valve stem.

3. Replace the Washer

Located at the bottom of the valve stem, the compression washer is often the culprit behind a leaky faucet. If it appears worn or deformed, replace it with a new one. Be sure to clean the washer holder beforehand so that the new washer fits neatly.

4. Replace O-Ring

The rubber O-ring that sits against the washer could also be the cause for your leak. If it’s damaged, you will need to replace it. Be sure to lightly coat the outside of the O-ring with waterproof plumber’s grease before assembling the faucet.


How to Fix a Cartridge Faucet

1. Take Off Handle

Examine the handle to see how it’s attached. You may see screw sets on the sides or back. Sometimes you’ll need to pop off a decorative cap with a flathead screwdriver. Then you can pull the handle straight up to remove it.

2. Remove Retaining Nut

Using pliers, unscrew the retaining nut and pull it out.

3. Pull Out the Cartridge

Pay attention to the placement of the current cartridge. You will need to orient a new one the same way. Pull straight up to remove the current cartridge.

4. Replace Cartridge

Bring the old cartridge with you to the hardware store to use as a reference. Find the exact part. Coat the new cartridge’s O-ring with plumbers grease and then insert into the faucet body. You will likely need to press firmly to make sure it’s in all the way. Remember to position it the same way as the original.


How to Fix a Disk Faucet

1. Lift Off Handle

Push the handle back. You should see a set screw. Remove it and lift the handle off. Some models may have a decorative cap to disguise a screw on the top.

2. Remove Ceramic Disk Cartridge

Once you remove the handle, you can usually pull the cartridge right out. Some faucets will have additional caps or screws holding the cartridge in place.

3. Clean and Replace Seals

The bottom of the cartridge is usually your problem area. Mineral deposits build up and prevent the seals from working properly. Remove all the rubber seals and O-rings. Using white vinegar and an abrasive pad, clean the cylinder openings and rinse well. Replace all the seals with new ones and reassemble the faucet.

4. Turn Water On Slowly

When you are done, carefully lift the handle to turn the water on. Do so slowly since the force of water can actually break the ceramic disk.


Stephens Plumbing Can Finally Stop Your Leaky Faucet

Fixing a leaky faucet isn’t an average skill. So if you find yourself at a loss, you’re not alone. The experienced professionals at Stephens Plumbing are available 24/7. We’re confident that our licensed plumbers can diagnose the problem and get your dripping faucet back to working order. Call Stephens Plumbing for all your kitchen and bathroom plumbing needs!